eCommerce
ECommerce API in action: WooCommerce & Shopify Setup
February 04, 2022 • 1483 Views • 20 min read
Tetiana Stoyko
CTO & Co-Founder
Apart from multiple technological developments influencing the retail market, there is one that creates a connection between all of them. ECommerce API is gradually boosting eCommerce websites by allowing them to communicate with one another. It is possible to utilize eCommerce API for data transmission between software, so then it can be used from one source. API integration tools serve as extensible platforms that interface with a variety of solutions, allowing businesses to leverage their existing capabilities rather than having to design new features from start.
ECommerce API delivers a variety of crucial advantages for competitiveness in the retail market, including omnichannel, new digital channels, real-time monitoring, and context-based offers. There is a possibility to link with partners and eCommerce websites that deploy APIs, provide their products through these companies’ digital channels, and vice versa.
Since such API integration tools need to handle a large number of requests, responses, and logic at the same time, it is better to implement one of the giants on the market, for example, WooCommerce API or Shopify API. Both platforms enable the development of a bespoke online store, even though they have differences and drawbacks. While making a decision on which one to choose for your online store: WooCommerce API or Shopify API, figure out if the setup process also fits your expectations. For your convenience, below you will find a gradual guide on eCommerce API integration for WooCommerce and Shopify.
Integrating Shopify API
Shopify is an all-in-one solution that lets you create an online store. With a few clicks, you can organize your products, customize your storefront, accept credit card payments, track and respond to orders. With the implementation of Shopify API, you can ensure payment security. Shopify’s technology is built to be simple to use. You can get an all-in-one eCommerce API that’s ready to go as soon as you are.
Getting started
In order for your app to access the Shopify API the first step should be creating an application within your Shopify partners account.
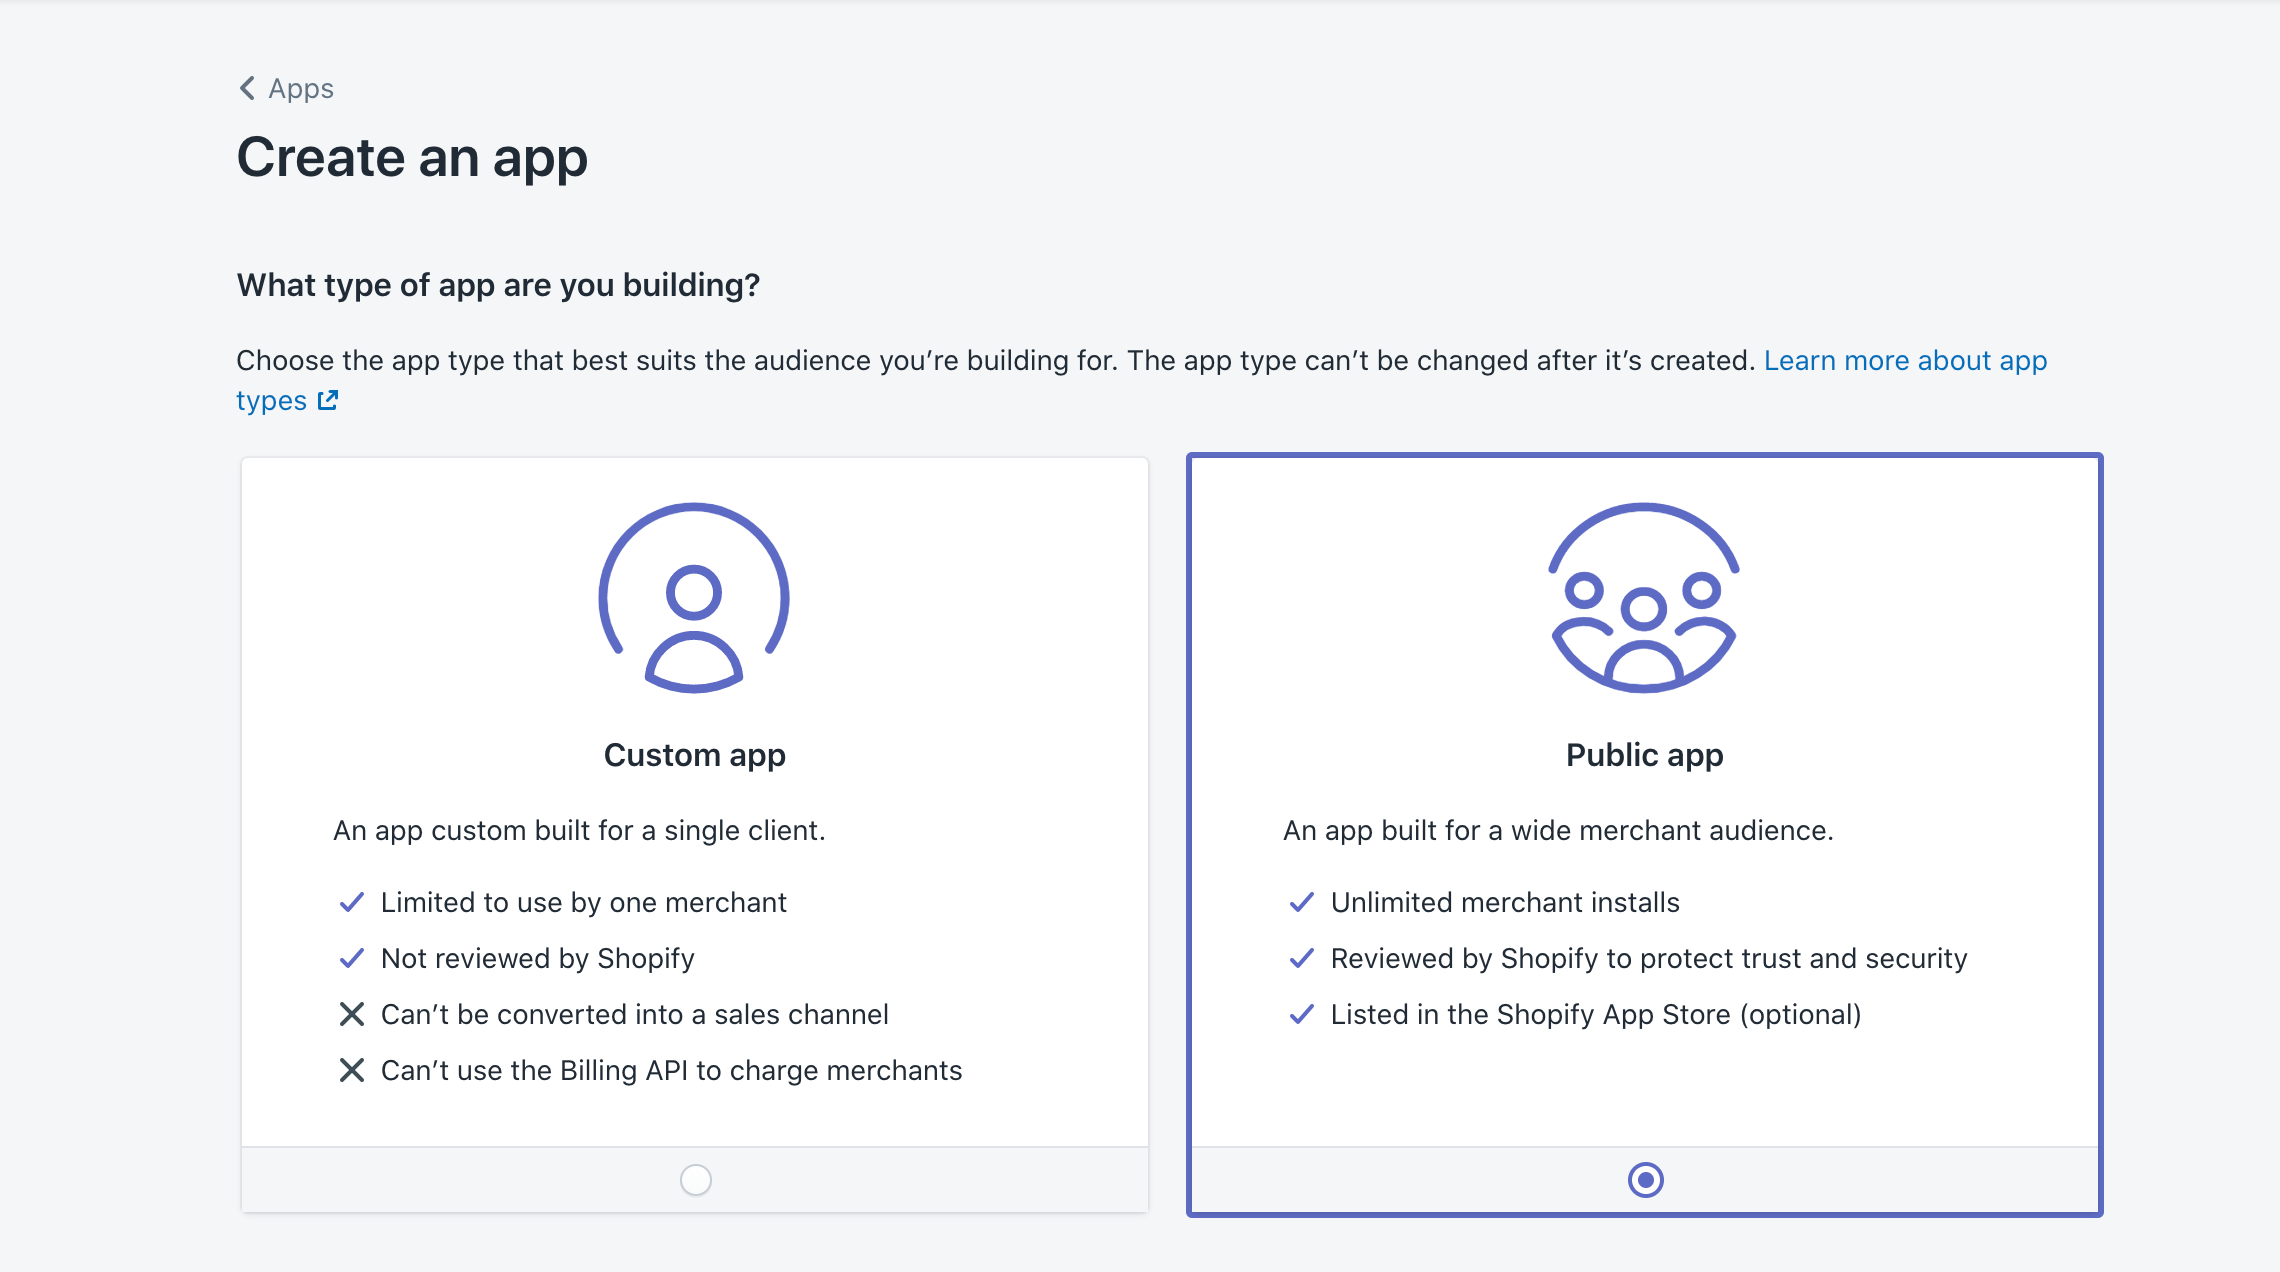
After you have signed up, in your dashboard select the Apps section and create the app to integrate Shopify API.
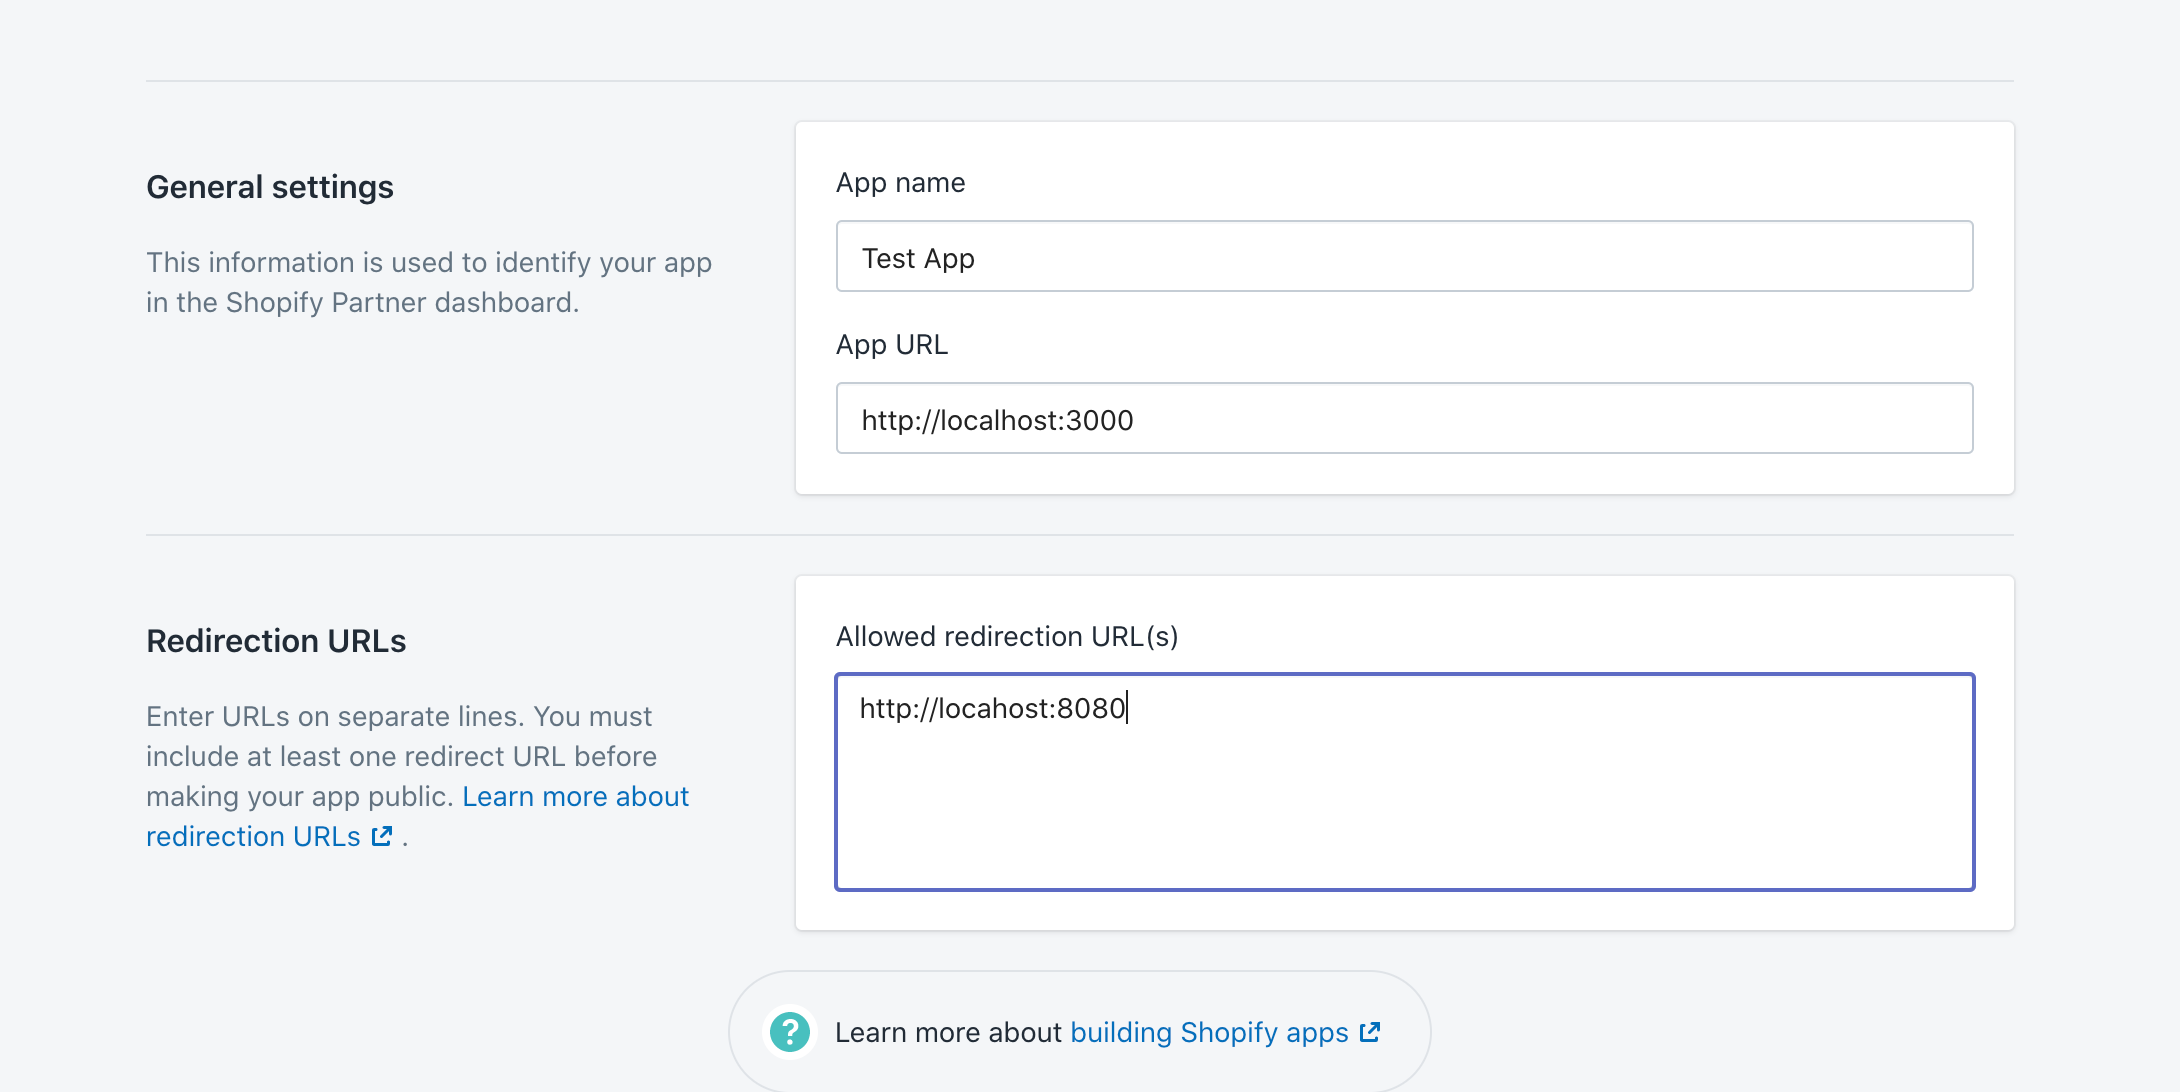
In general, settings fill in your app name, app URL and provide a redirect URL, which will handle successful authorization to Shopify account in your app. In our case, it’s our backend endpoint.
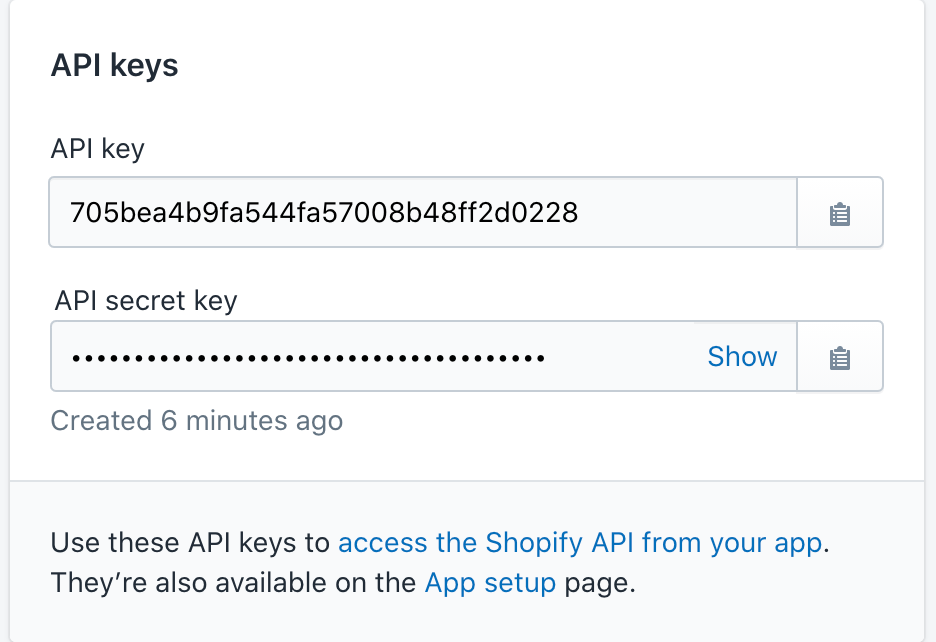
The keys are suitable for every store based on Shopify API.
OAuth
To start the OAuth process we should open the OAuth window for a specific store. The URL has the format:
- https://{shop}.myshopify.com/admin/ oauth/authorize?client_id={api_key}&scope ={scopes}&redirect_uri= {redirect_uri}&state={nonce}&grant_options[] ={access_mode}
shop: the name of the shop, scopes: list of the API resources to be accessed, nonce: can be anything, we can put there the user token of our app as an example (it will be returned to our handler), access_mode: can be ‘per_user’ for online access, and ‘value’ for offline access.
In our case the OAuth URL will be the following:
- https://test-incora.myshopify.com/admin/oauth /authorize?client_id=705bea4b9fa544f a57008b48ff2d0228&scope= read_customers,write_products &redirect_uri=http://localhost:8080 /shopify-auth&state=user_token&grant_ options[]=per_user
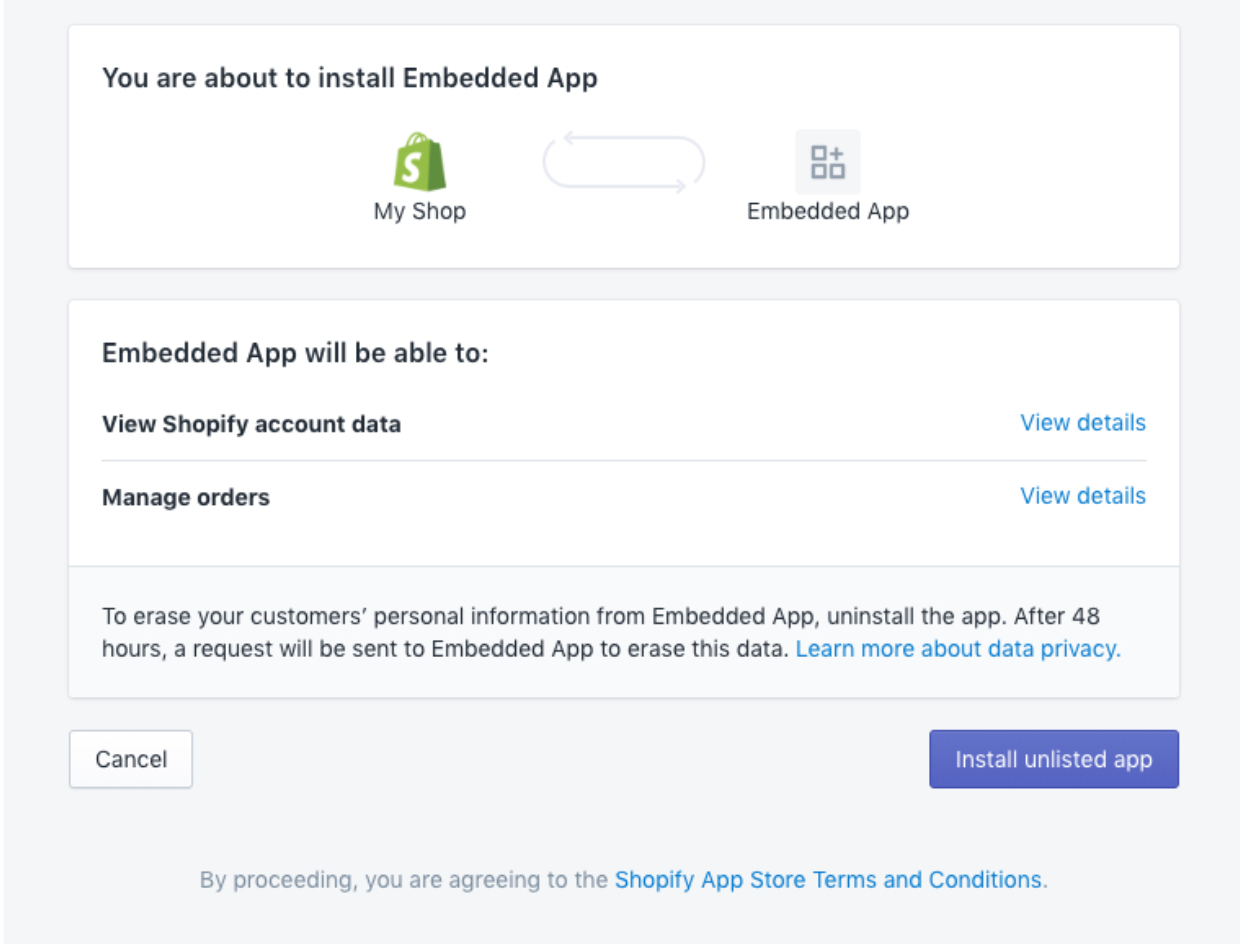
After you successfully logged in to your Shopify account you’ll see the page where you should confirm app installation.
We are using Axios as an HTTP client.
const getToken = (shopname, data) => {
  return axios.post(`https://${shopname}/admin/oauth/access_token`, data);
};
The request handler should look like below.
router.get('/shopify-auth, async (req, res) => {
 const { code, shop } = req.query;
 const { data: { access_token: token } } = await getToken(shop, {
      client_id: /* api_key */,
      client_secret:  /* api_secret */,
      code,
 });

  // save token to e.g. redis
  // redirect to the FE page
});
Our query params payload will contain code that will only be used once to obtain an access token. It’s better to save a token to some cache storage and send a redirect as the response.
Using API
After you get the token you can use the endpoints of Shopify API. For example, let’s add a method to get products of the shop:
const getProducts = (shopname, token, params = {}) => {
  return axios.get(`https://${shopname}/admin/api//2021-01products.json`, {
    params,
    headers: { 'X-Shopify-Access-Token': token }
  });
};
At this step, the installation process is over, and you are good to go with applied API integration tools, that will enable your online store to fully functioning.
Applying Woocommerce API
WooCommerce is an open-source eCommerce plugin for WordPress. It is designed for small and large-sized online merchants using WordPress. It simplifies the process of setting up and running an online store by providing respectable levels of flexibility and a number of essential features such as inventory and tax administration, secure payment processing, and shipping integration.
The WordPress REST API is strongly embedded with the WooCommerce API. This enables requests in JSON format, WordPress REST API Authentication methods, and regular HTTP verbs to be used to create, read, update, and delete its contents.
To start API integration, you should prepare for the 4 main steps: Authorization, Import, Export, and Webhooks. Let’s begin with Authorization.
Authorization
We use a consumer key, consumer secret, and host (WooCommerce shop name) for all requests to the WooCommerce API.
const updateWoocommerceConnectionField = async (req, res) => {
 try {
   const userId = req.user.id;
   const { consumerKey, consumerSecret, host } = req.body;
   await woocommerceHelper.checkKeys(host, consumerKey, consumerSecret);
   await User.query()
     .where({ id: userId })
     .update({
       woocommerce_connection: {
         consumerKey,
         consumerSecret,
         host: formatHost(host),
       }
     });
   const params = { consumer_key: consumerKey, consumer_secret: consumerSecret };
   createWebHook(host, params);
   return res.status(200).json();
 } catch (e) {
   apiHelper.builder(res, getError(e));
 }
};
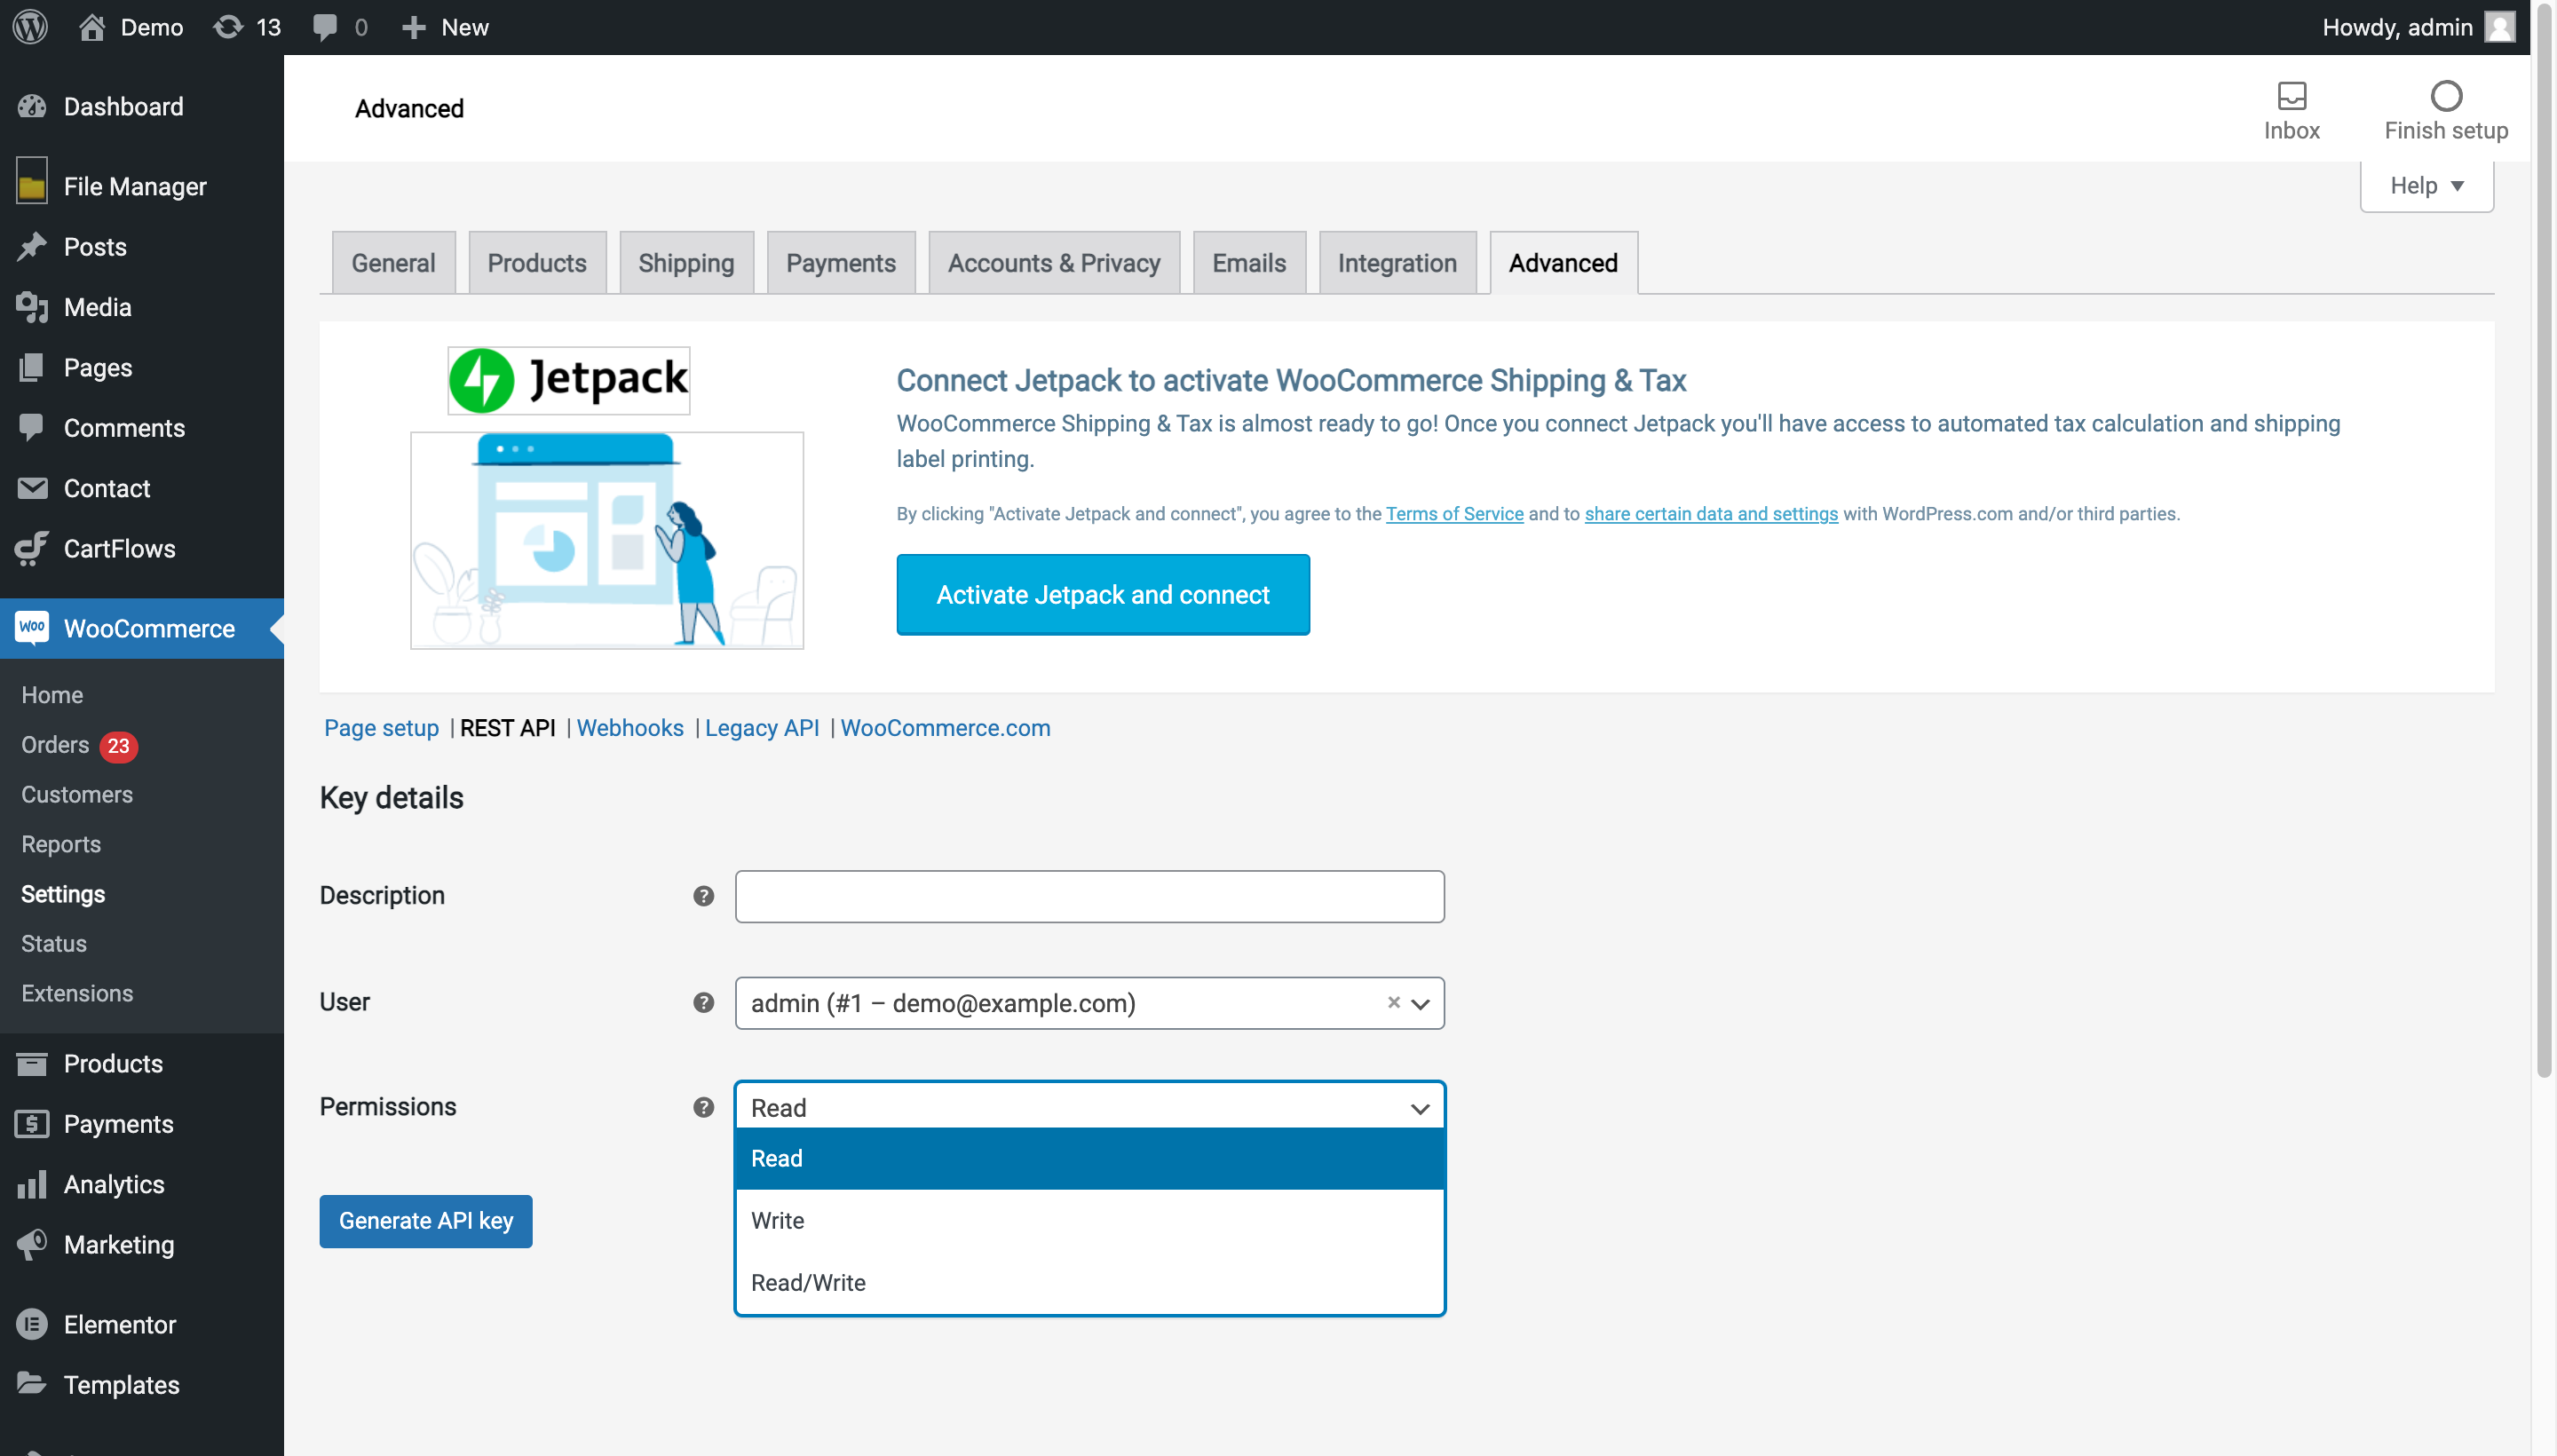
So to get the consumer key and secret you need to create an account on WooCommerce, then login to the admin page and press “Woocommerce”-> “Settings”-> “Advanced”-> “REST API”. On this page you should click “Add key” and here you can choose the level of access for this REST API key, which can be Read access, Write access or Read/Write access.
After you’ve completed these steps, click the “Generate API Key” button, and the WooCommerce API will create REST API keys for the user you specified. You can see these credentials only one time when you generate them, so you should save them. API keys are not transferred to other users, it means one user – one consumer secret and key.
Import
Now our app has three integrations with Shopify, Woocommerce, and Magento, so we use the Factory method to initialize new integration services.
class IntegrationServiceFactory {
 static create(serviceName) {
   switch (serviceName) {
     case INTEGRATIONS.SERVICES_NAMES.SHOPIFY:
       return new ShopifyIntegrationsService(serviceName);
     case INTEGRATIONS.SERVICES_NAMES.WOOCOMMERCE:
       return new WoocommerceIntegrationsService(serviceName);
     case INTEGRATIONS.SERVICES_NAMES.MAGENTO:
       return new MagentoIntegrationsService(serviceName);
     default:
       return null;
   }
 }
}
To find the products which are necessary, we employ pagination. Woocommerce REST API offers a lot of different parameters for pagination such as offset, search, per_page, order, orderby. For every request, you should add a consumer key and secret to the parameters.
The first-order position in every endpoint should be the host (your shop name). The current version of the WP REST API integration is v3, which takes a second-order position, and the product ID is the last part of the URL. So, the request should look like this:
curl https://host.com/wp-json/wc/v3/products/794 \
    -u consumer_key,consumer_secret
Please note: The total number of resources and pages are always included in the X-WP-Total and X-WP-TotalPages HTTP headers.
Export
Export is not as easy as an import. We need some more requests and steps to create the products at WooCommerce. There are three parts: setting data for synchronization, creating, and updating. When we talk about synchronization it is a good practice to have the table at DB (ProductsSources at our app) where already imported or exported products will be stored. We filter the products which do not exist at WooCommerce by using our ProductsSources and then create them there.
 async createProducts() {
   const productsToCreate = this.products.filter((pr) => {
     const source = this.productsSources
       .find(ps => Number(ps.productId) === Number(pr.id));
     return !source || !this.thirdPartyProducts
       .some(({ id }) => Number(id) === Number(source.sourceData.id));
   });
   const createdProducts = [];
   for (const product of productsToCreate) {
     const result = await this.createProduct(product);
     await ProductsSources.add({
       productId: product.id,
       serviceName: this._serviceName,
       userId: this.user.id,
       sourceData: this.getSourceData(result),
     });
     createdProducts.push(result);
   }
   return createdProducts.length;
 }
Send a POST request to Woocommerce API to create a product:
curl -X POST https://host.com/wp-json/wc/v3/products \
    -u consumer_key,consumer_secret \
    -H "Content-Type: application/json" \
    -d '{
  "name": "Premium Quality",
  "price": "21.99",
  "description": "Lorem ipsum dolor sit amet, consectetur
adipiscing elit, sed do eiusmod tempor incididunt ut labore et
dolore magna aliqua. Ut enim ad minim veniam, quis nostrud
exercitation ullamco laboris nisi ut aliquip ex ea commodo
consequat.",
    }
  ]
}'
Please note: If you want to get all products from WooCommerce you need to use an iterator because requests that return multiple items (products in our case) will be paginated to 10 items by default.
When non-existing products are already created, we need to update the other products which we have at ProductSources. We look for a similar product in our app and update it at WooCommerce with our data. The update request looks like the one for creation, but you need to add a product ID at the end of the URL.
WooCommerce products IDs are stored at ProductsSources. The example of a PUT request to update a product is shown below.
curl -X PUT https://host.com/wp-json/wc/v3/products/228 \
    -u consumer_key,consumer_secret \
    -H "Content-Type: application/json" \
    -d '{
  "price": "22.05"
}'
Webhooks
Our integration needs to create, update and delete webhook functionality. So we have three routes (delivery_url) for each webhook.
.post(
   '/woocommerce_order_paid',
   verifyWoocommerceWebhook([
     WOOCOMMERCE_WEBHOOK_TOPICS.ORDERS_CREATE,
   ]),
   webhooksController.woocommerceOrderCreatedController,
 )
 .post(
   '/woocommerce_order_updated',
   verifyWoocommerceWebhook([
     WOOCOMMERCE_WEBHOOK_TOPICS.ORDERS_UPDATE,
   ]),
   webhooksController.woocommerceOrderUpdatedController,
 )
 .post(
   '/woocommerce_order_deleted',
   verifyWoocommerceWebhook([
     WOOCOMMERCE_WEBHOOK_TOPICS.ORDERS_DELETE,
   ]),
   webhooksController.woocommerceOrderDeletedController,
 )
When we talk about WooCommerce authorization, you can see the function ‘createWebhook’. So we get all webhooks from WooCommerce and check if any webhook with the same topics and delivery URL doesn’t exist. We use an iterator to get all of them. Pay attention to the notes above, because they will be helpful for an iterator function either.
const createWebHook = async (host, params) => {
const webhooksIterator = await new WoocommerceDataGetterIterator('webhooks',
host, params);
 const webhooks = [];
 while (webhooksIterator.hasNext()) {
   webhooks.push(...(await webhooksIterator.next()));
 }
 for (const webhookTopic of Object.values(WOOCOMMERCE_WEBHOOK_TOPICS)) {
   if (!webhooks.some(webhook => webhook.delivery_url ===
WOOCOMMERCE_WEBHOOK_HANDLERS_URLS[webhookTopic]
       && webhook.topic === webhookTopic)) {
     const webhookCreateData = {
       name: WOOCOMMERCE_WEBHOOK_NAME[webhookTopic],
       topic: webhookTopic,
       delivery_url: WOOCOMMERCE_WEBHOOK_HANDLERS_URLS[webhookTopic],
       secret: WOOCOMMERCE_WEBHOOK_SECRET,
     };
     await woocommerceApi.createWebHooks(host, webhookCreateData, params);
   }
 }
};
So the data for this request looks like this:
name: the name which the user can see on the Admin page topic: which type of webhook you want to create delivery_url: the URL where the payload is delivered secret: the secret key that helps to build an HMAC-SHA256 hash of the request body for enabling webhook’s validity.
This request helps you to create a webhook:
curl -X POST https://example.com/wp-json/wc/v3/webhooks \
    -u consumer_key:consumer_secret \
    -H "Content-Type: application/json" \
    -d '{
  "name": "Order create Incora",
  "topic": "order.updated",
  "delivery_url": "http://yourapi/yourpath"
"secret": "secret"
}'
Please note: Woocommerce supports only HTTPS redirect URLs. So, for local testing, you will need to set up ngrok.
Also, you can see “verifyWooCommerceWebhook” middleware on each of these three routes. The main functionality is to create “generatedHmac” from request body using secret, which we added to Webhook POST request. If this value is equal to x-wc-webhook-signature which will be included in request headers, it means the request came from WooCommerce REST API. Also, you can check if the topic is correct by getting it from the x-wc-webhook-topic header.
const verifyWoocommerceWebhook = topics => async (req, res, next) => {
 try {
   const headerHmac = req.headers[WOOCOMMERCE_HEADERS_KEYS.WEBHOOK_SIGNATURE];
   const generatedHmac = crypto
     .createHmac('sha256', secret)
     .update(req.bufferBody)
     .digest('base64');
   if (headerHmac !== generatedHmac) {
     throw new Error(IMPOSSIBLE_VERIFYING);
   }
   if (!topics.some(topic => req.headers[WOOCOMMERCE_HEADERS_KEYS.WEBHOOK_TOPIC]
=== topic)) {
     throw new Error(INCORRECT_TOPIC);
   }
   next();
 } catch (e) {
   apiHelper.builder(res, getError(e));
 }
};
Please note: You might find it useful to add this middleware to your delivery URLs. If there isn’t a verifying function, anyone who wants to throttle your API can send a request to these URLs.
That is the whole process of API integration for WooCommerce. After fulfilling all four steps we described, your online store should be ready for the production stage.
Wrapping up
The ECommerce API integration can help you enhance your business processes, increase engagement, connect your customers with goods they want, and far more. No matter if you choose to implement WooCommerce API or Shopify API, either way by deploying API integration tools the e-commerce shipping and order fulfillment of your online store will be much easier.
Thus, to make your existing or future online store benefit from the eCommerce API integration, you should consider deploying one of the well-known eCommerce solutions. To help you with that, we are more than pleased to provide you with the full support of our team on behalf just API Integration or building an online store from scratch. Just fill in the contact form, and wait for the idea to realize.
What’s your impression after reading this?
Love it!
1
Valuable
1
Exciting
1
Unsatisfied
1
FAQ
Let us address your doubts and clarify key points from the article for better understanding.
you may also like
Let’s talk!
This site uses cookies to improve your user experience. Read our Privacy Policy
Accept
Share this article